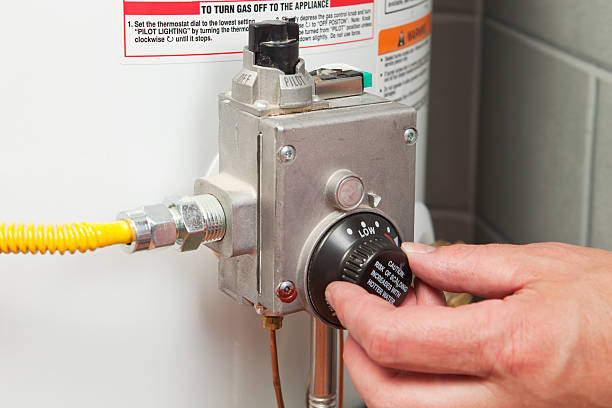
The pilot light on a water heater can go out for various reasons. If you see that the pilot light has gone out, there might be some issue in the water heater that needs to be repaired. But if it goes out due to the gas pressure variation, you can take the following steps to light it. Check out the steps given below to learn how to light a pilot light on a water heater:
1. Turning Off The Gas:
The first thing that you need to do is shut off the gas. For this, you need to locate the gas shut-off valve, and then turn the valve to the “off” position. After turning off the gas supply, wait for at least five minutes before moving on to the next step.
2. Locate The Pilot Light:
The next step involves locating the pilot light; for this, you will require a flashlight. The pilot light is usually located below the water tank. To access it, you will need to remove the access panel. Modern water heaters cover the pilot light under a glass panel. If you can see the flame burning, then the pilot light is already working, and you need to contact a professional to check your water heater for other potential issues.
3. Finding Out Gas Leaks:
Before taking this process further, you need to confirm that there is no gas leaking. If you ignite a flame near the gas leakage, it would be very dangerous for you and your property. You should only ignite the pilot light if there is no gas leakage in its proximity. One of the ways that you can detect a gas leakage is by carefully smelling around your water heater for the odor of natural gas.
4. Igniting The Pilot Light:
Once you are absolutely certain that there are no gas leaks, it is time for you to ignite the pilot light. You can achieve this by turning on the shut-off valve. Modern water heaters have a separate red button available that can be turned on whenever you want to switch on the pilot light. Make sure that you read the instruction manual given with your water heater before reigniting the pilot light and follow the instructions closely.
Tip: If you are operating a newer model, you will find a red button named ignition. All you have to do is press it to reignite the pilot light. But again, be sure to follow the specific instructions in the user manual that came with your water heater.
5. Ensure The Flame Remains Lit And The Water Heater Is Functioning Effectively:
After a minute or two, check if the pilot light remains lit. After this, you will hear a whoosh sound that will let you know that the burner is now properly working again.
Conclusion
So now you know the basics of, how to light a pilot light on a water heater. If you still feel unsure about how to check the pilot light on your water heater, you should get in touch with an experienced plumbing service provider near you to help take care of this for you. With the service of an experienced plumber, you can rest assured that you and your family will not be at risk when dealing with this kind of sensitive gas equipment.


